
 Send Your Inquiry
How to Fix Cracks in Plaster Walls | Ultimate Guide
During the construction process, cracks on plaster walls are quite common. As the plastering mortar cures, it shrinks, and easily lead to cracking to different extents. However, such cracking is not inevitable and can be avoided.
Most of the cracking in plastered walls is due to two reasons: one is human operation, and the other is technical application.
It is necessary to carry out control in the beginning of the project from several aspects, such as the structure of the construction range, the formula, and the construction quality. Because once cracking has occurred, the only thing is to admit the mistake and conduct effective repair of the cracks.

Six Major Factors Causing Cracks
Factor 1. Cement Board Installation Issues
1) The joints between the cement boards are not aligned;
2) The gap dimensions of the cement board joints were not properly controlled;
3) Poor quality of the jointing material between the cement board joints;
4) Deformation and damage of the board due to moisture;
5) Poor fixing to steel studs or substructure
Factor 2. Reinforcement Mesh Installation Problems
1) The metal mesh (first layer) was not correctly set up and fixed;
2) The second and third layers of anti-cracking nets are not set up properly;
3) The first layer was not reinforced with fiberglass mesh
*If the reinforcing layer is not in place, it will reduce the overall tensile performance and increase the risk of cracking.
Factor 3. Plastering Mortar Composition Ratio
1) The proportion of cement, sand and water is unreasonable;
2) Excessively high water-cement ratio (resulting in shrinkage cracks, hairline and spider cracks);
3) Insufficient addition of adhesives or reinforcing fibers;
4) Improper proportion of retarders or other additives
Factor 4. External Interference (Vibration/Deformation)
1)Vibrations from nearby machinery affect the wall surface;
2)The building or steel structure expands and contracts due to temperature changes;
3)The cement board was not firmly fixed, causing deformation and resulting in different curing movements of the plastering layer
Factor 5. Construction Operation Environment
1) Construction under high temperature (>95℉)
The water evaporates too quickly;
The tensile strength decreases
2) Construction under low temperature (<44.6℉)
Prolonged setting time;
Slow intensity development;
Risk of freezing;
Plastic shrinkage cracks
3) Relative humidity impact
4) Wind speed (5.5–7.9 m/s above increases evaporation risk)
5) Direct sunlight exposure
Factor 6. Curing Maintenance
1) Surface–core curing inconsistency (non-uniform shrinkage between inside and outside)
2) Rapid thermal expansion and contraction within a short period
3) Insufficient moisture during the curing period
How to Prevent Cracks in Plaster Walls?
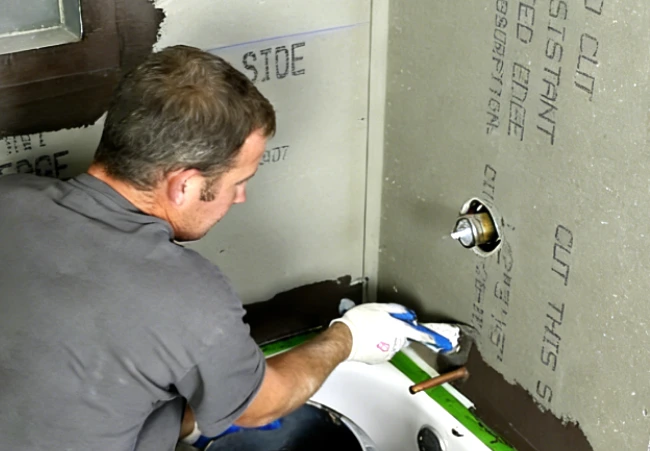
1. Proper Cement Board Installation
1) Align the board seams and ensure a reasonable gap
2) Select the appropriate jointing material and ensure the construction quality
3) Avoid using deformed or damaged boards
4) Ensure that the board is firmly fixed to the keel
2. Correct Reinforcement System Setup
1) Install the metal mesh correctly on the first layer
2) The second and third layers are equipped with anti-cracking nets
3) Or the first layer is reinforced with glass fiber mesh
4) Ensure that the mesh fabric is fully overlapped and fixed
3. Optimize Mortar Mix Design
1) Reasonably control the water-cement ratio
2) Add an appropriate amount of adhesive
3) Add anti-cracking reinforcing fibers
4) Select an appropriate retarder
5) Adjust the proportion according to the construction environment
4. Control External Disturbance
1) Avoid vibration operations during the initial setting stage of plastering
2) Control the connection method of the scaffolding
3) Minimize the construction of heavy machinery around as much as possible
5. Provide Expansion / Control Joints
1) Set temperature joints for large areas of walls
2) Arrange the expansion joints reasonably
3) Reduce stress concentration
6. Strict Environmental Control
Temperature Control
1) Control the construction temperature between 44.6°F and 95°F.
2) Take shading measures when the temperature is high
3) Avoid construction or take insulation measures at low temperatures
Humidity & Sunlight Protection
1) Avoid direct sunlight and high wind
2) Set up shelter when necessary
7. Proper Curing Management
1) Follow local maintenance standards
2) Perform moist maintenance
3) Sunshade and wind protection
4) Finished product protection
5) Ensure uniform curing both inside and out
How to Fix Cracks in Plaster Walls?
When repairing cracked plastered walls, people are more likely to use the fastest or most economical ways for the repair. However, these approaches may not solve the problem at its root.
Some repair methods can cover up the cracks temporarily, but after a period of thermal expansion and contraction throughout the seasons, these walls are very likely to develop the same or even more severe cracks again.
Therefore, it is necessary to identify the root cause of each wall’s cracking. Using a single solution to address all the cracking situations that have occurred is not the right way. The repair of cracks on plastered walls (includes both new plastered walls and old plastered walls) should be carried out in accordance with the logic of below.
Inspection → Judgment → Treatment → Reinforcement → Re-construction
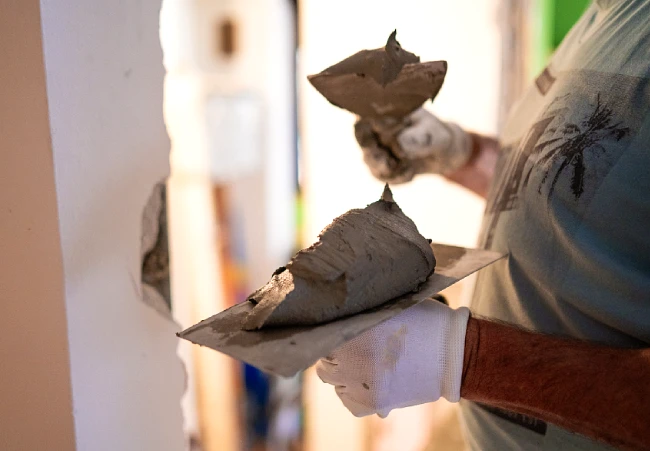
STEP 1: Inspect the Condition of the Wall
Check if the wall is uneven
1) Use a flashlight to shine close to the wall.
2) Slowly move the light source along the wall.
3) Observe the wall through side light to see if there are any uneven or wavy areas.
Focus on checking:
• Areas where cracks have already appeared
• Uncoated cement board areas
STEP 2: Take Corresponding Measures Based on the Type of Problem
Situation 1: The cement board is only uneven (without any looseness)
Treatment method:
1) Add a layer of fiberglass mesh to the uneven areas.
2) Increase the thickness of the plaster appropriately.
3) Level the surface to the final finish layer requirements.
Purpose:
• Enhance the local tensile strength
• Improve surface flatness
• Reduce the risk of cracking in the later stage
Situation 2: The cement board is loose or not firmly fixed
Treatment method:
1) Strengthen the fixation of cement boards to keels or base structures.
2) Ensure that the mechanical fixation is firm and reliable.
3) Do not proceed with plastering until the structure is stable.
Situation 3: Both of the above two situations exist
Treatment method:
1) First, reinforce the fixed structure
2) Then add fiberglass mesh and level it
In this way, base reinforcement and smooth surface can be achieved at the same time. This reduce the recurrence of cracking caused by thermal expansion and contraction.
STEP 3: Overall Reinforcement Treatment Before Construction
After the base inspection and repair are completed, and before the carving layer and coloring construction, WOTAIchem™ recommends:
1) The entire wall surface be coated with a layer of thickener or interface enhancer.
2) Wait until it is completely dry (usually 1 to 2 days).
3) Proceed with the surface finish construction.
Function
• Enhance the interlayer bonding strength
• Enhance overall crack resistance performance
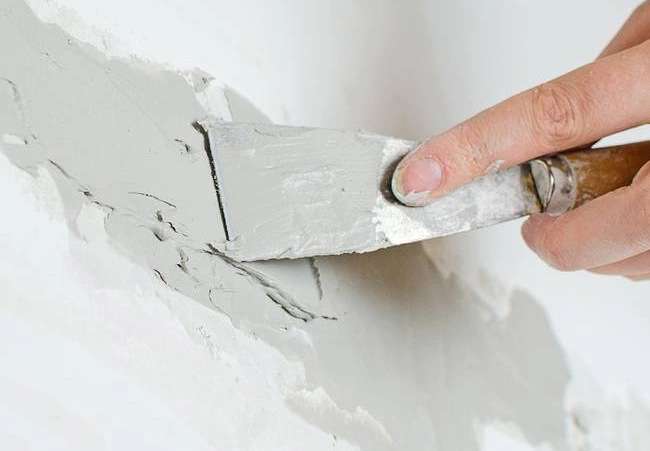
STEP 4: Ensure the Correct Construction of the Reinforcement System
1) Requirements for the roughened layer metal mesh:
• It must be fixed firmly
• No loosening or bulging is allowed
• The metal mesh should cover the gaps between the cement boards
Purpose:
• Dispersed stress
• Reduce the stress concentration at the board joints caused by thermal expansion and contraction
• Reduce the risk of cracking in the main plastering layer
2) Fiberglass mesh must be set between each layer of plastering.
• First apply a 4–6mm thick plastering mortar.
• Lay the fiberglass mesh in the wet mortar.
• Ensure the fiberglass mesh is located in the middle position of the thickness of this layer of mortar.
• Then proceed with the construction of subsequent plastering layers.
Note: The fiberglass mesh should not be attached to the surface or the base layer, but should be embedded in the middle.
Functions:
• Enhance interlayer adhesion
• Increase tensile strength
• Reduce shrinkage cracks
• Improve overall structural stability
STEP 5: Distinguish Between Structural Cracks & Non-structural Cracks
[Structural Cracks]
If the following problems occur, address the structural defects firstly, and then carry out surface repair again. Otherwise, the cracks will keep recurring.
• The load-bearing components were not fixed firmly
• The supporting structure is loose
• The mortar did not completely cover the metal mesh
• The reinforcement layer is insufficient
How to repair structural cracks on plaster walls?
1. Patching for loose layers
For small-scale loose areas, such as those no larger than 400 mm × 400 mm, drill 2 to 3 holes with a diameter of about 30 mm. After humidifying the surrounding and inner areas of the loose area, fill the loose part with plaster mortar that contains additional backing glue or adhesive / reinforcing fibers.
For large-scale loose areas, consider removing the loose parts and re-conducting the overall construction of the loose area.
2. Repairing uneven cement boards
For small areas of uneven cement boards, add fiberglass mesh plaster and plaster mortar to level / fill the low-lying parts. Use a flashlight or laser instrument to detect the level until it is flat.
For large areas of uneven cement boards, repair the problem area as needed. Fix the loose parts, reinstall the cement boards, add a layer of plaster mortar with fiberglass mesh, or even consider adding another layer of cement boards to adjust the overall levelness.
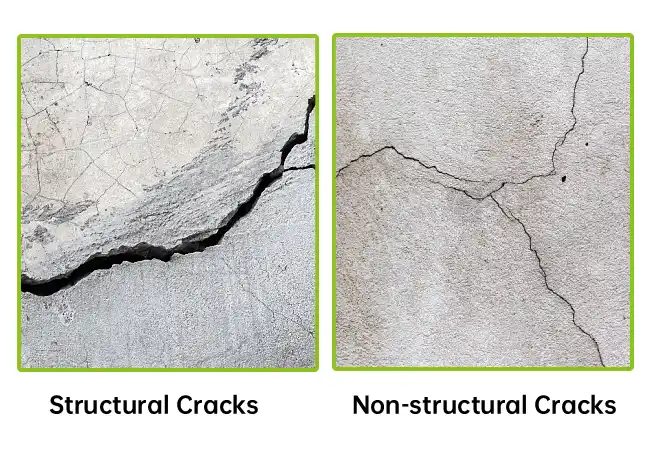
[Non-structural Cracks]
For example:
• Surface shrinkage cracks
• Fine cracks
Treatment method: It can be repaired with a dedicated repair agent or grouting material.
How to repair non-structural cracks on plaster walls?
Non-structural cracks are also known as hairline cracks or spider cracks. Without changing the formula and without reworking, the cracks can be filled and smoothed out through a repair method. Then, a layer of thickening agent needs to be applied to increase the overall tensile strength and reduce the extension of the cracks.
Depending on geographical, environmental, and seasonal factors, the range of adjustments that may need to be made in the plastering mix ratio includes:
1. Sand particles: Reduce or increase the size of the sand particles to increase the adhesion of the plastering mortar;
2. Cement ratio: Reduce the cement ratio, which means reducing the secondary compressive strength of the plastering mortar while increasing its main tensile strength, thereby enhancing the original tensile property of the wall;
3. Adhesive ratio: Increase the ratio of the back adhesive, interface agent, or adhesive in the plastering mortar to enhance the overall adhesion and crack resistance;
4. Reinforcing fibers: Ensure that the reinforcing fibers specified in the general technical specifications are maintained at a proportion of 1% to 2%;
5. Water retention agent: In seasonal construction, the roughening layer and the engraving layer must contain a water retention agent to allow moisture to remain in the polymer and be uniformly released during the curing process, effectively stopping the cracking;
6. Retarding agent: In the engraving layer mortar, a retarding agent must be added to delay the curing time relative to the time required for the engraving formation;
7. Water ratio: The water ratio must be strictly controlled. If the water ratio exceeds the water ratio set by the plastering manufacturer, it will lead to a decrease in tensile and compressive strength, thereby causing or increasing cracking.
At the construction site, it is necessary to stipulate that the construction personnel follow the water ratio specified in the technical specification book. Each supplier has its own special plastering formula.
To reduce the risk of cracking in the new plastered wall, the supplier should make corresponding adjustments to the plastering mix ratio based on the geographical location, season, and overall environment of the individual project.
Crack Repair Methods
Method 1: Crack Filling Method
For some construction teams, they will carry out the grinding and coloring work immediately after the crack filling is completed. They believe the problem is solved. However, this solution is only effective for minor cracks or those on the surface of the plaster mortar that are relatively small. It is ineffective for other types of cracks caused by other reasons.
Method 2: Glue Injection Crack Repair Method
For other construction teams, they may adopt the crack glue injection method to solve the cracking problem. Although this method is more expensive, it may be more effective or more long-lasting for minor surface cracks of the plaster mortar.
Method 3: Adjusting Plastering Formula
After carefully analyzing the root cause, it is decided to change the original plastering formula, and through the test on the wall, a crack-free situation is achieved.
Because as long as the foundation of the plastered wall is stable, then changing the formula is the most effective and long-lasting approach. However, any formula requires verification to obtain the best formula for preventing cracking and the ratio of various materials.
Technical Specifications
Reinforced Mesh
The mesh is made of 12 mm × 12 mm, with a weight of 125 g/m2, of alkali-resistant glass fiber or polypropylene or polyester fiber.
Working Temperature
When the temperature is higher than 95°F or lower than 44.6°F, the plastering work shall not be carried out without taking reliable measures. The temperature during the drying and curing period can reach above 95°F or below 44.6°F.
Curing
During the internal curing of the plaster layer, the mixed water should be evaporated as much as possible. During the drying process, the temperature should be maintained between 50°F and 95°F, and indirect ventilation should be provided. The surface curing of the plaster layer should provide as much moisture protection as possible, and should remain moist for at least 7 days.
Back Mesh
The perforation spacing of the back mesh should be controlled within 400 mm × 400 mm, and it should be firm without loosening.
Mix Ratio
• Abrasion Layer
When using a spray machine to mix cement mortar, add water slowly and mix with the corresponding mixer for 3 minutes. Add 4.6 – 5.2 L of water for every 30 kg of mixture. This mix ratio can be adjusted slightly within the allowable range of the technical specification according to the weather conditions.
• Carving Layer
When using a spray machine to mix cement mortar, add water slowly and mix with the corresponding mixer for 3 minutes. Add 5.5 – 6 L of water for every 30 kg of mixture.
The mixing ratio may be slightly adjusted within the allowable range of technical parameters according to the weather conditions.
Maintenance
During the drying process, the temperature should be maintained between 44.6°F and 95°F, and ventilation should be maintained. During the 7-day maintenance period, water should be sprayed onto the completed carved surface once every 3 hours (depending on the weather conditions) for wet curing.
When the temperature exceeds 20 ℃ or is directly exposed to sunlight, a piece of canvas should be covered on the surface of the plastering layer to avoid direct sunlight or a curing agent should be used to prevent excessive curing time.
Seasonal Construction Measures
1) Record the weather forecast and conduct temperature measurements;
2) When the base layer or the surrounding air is below 44.6°F or above 95°F, the plastering work should be stopped;
3) During the plastering construction, keep the minimum environmental temperature at 44.6°F until solidification;
4) During the plastering curing period, when the temperature exceeds 68°F or is directly exposed to sunlight, a curing agent should be used on the surface to prevent excessive curing time;
5) During the 7-day curing period, the external area should be kept humid;
6) A rain and sun protection shed made of steel pipes and wooden strips will be erected between the top of the external scaffolding and the parapet wall to prevent rain and sun exposure;
7) During summer construction, heatstroke prevention and cooling measures should be taken;
8) In summer, the mixture of mortar should be protected to prevent excessive evaporation.

Conclusion
For any building, its foundation must first be stable. Only when the upper beam is straight can the lower beam not be tilted. The same is true for plastered walls, only when their base layer is solid and the surface layer is stable.
Q: How to use the back mesh (metal mesh)?
A: The metal mesh (back mesh) that the scratch coat adheres to must first be fixed to a sturdy board, like a cement board or gypsum board.
According to construction standards, the holes in the back mesh should not be larger than 400mm × 400mm. However, at corners or joints between different materials—areas prone to cracking—the mesh holes should be made smaller, or the mesh sheets should be overlapped.
This ensures the mesh fits tightly against the board, so the scratch coat can grip it firmly, preventing hollowing, movement, and ultimately wall cracks.
Q: How to use the reinforcing mesh (fiberglass mesh)?
A: The amount of reinforcing mesh depends on the specific process, but generally, a layer of fiberglass mesh should be placed between the scratch coat and the second (or decorative) layer. This helps the plaster mortar better grip the scratch coat.
Q: How thick should the plaster layers be?
A: Each plaster layer should ideally be between 12–15 millimeters thick, and never exceed 15mm. This greatly reduces the risk of cracking.
Q: The board itself is crucial, why?
A: If the cement board is not flat, has bumps or dents, or is deformed, the chance of the plaster layer cracking will increase significantly.
About WOTAIchem™
WOTAIchem™ specializes in a comprehensive range of building material additives products, including solutions for plaster walls, wall putties, tile adhesives, coatings and paints, mortars, adhesives, concrete and gypsums. With rich experience in more than 200 construction projects, we have refined our technology to upgrade from crack prevention to structural reinforcement.
If you encounter any questions regarding product selection, application technology or customized solutions, please feel free to contact us. Our team is committed to providing professional support for the success of your project!

Posted by Isabel leave words
Hi, I've been in this industry for five years. I hope you enjoyed my blog. Welcome to leave a comment down below.
Great guide—understanding how to properly fix cracks in plaster walls can help homeowners maintain both the appearance and strength of their interiors. Using the right repair methods early can prevent small cracks from turning into bigger, more costly problems.
Yes!
Great ultimate guide on fixing cracks in plaster walls — identifying the crack type, preparing the surface properly, and using the right repair materials are essential steps to restore a smooth, durable finish.
Leave a Reply