
 Send Your Inquiry
How To Use Wall Putty Correctly
During the renovation process, knowing how to use wall putty correctly is often a challenge. Correct application not only ensures a smooth, durable, and visually appealing wall but also helps prevent unnecessary waste and reduces your costs.
In this blog, we’ll walk you through the entire application procedure, from gathering the necessary tools and materials to the final touches. By the end, you’ll be equipped with all the knowledge you need to handle wall putty like a pro and transform your walls with confidence.
What is Wall Putty?
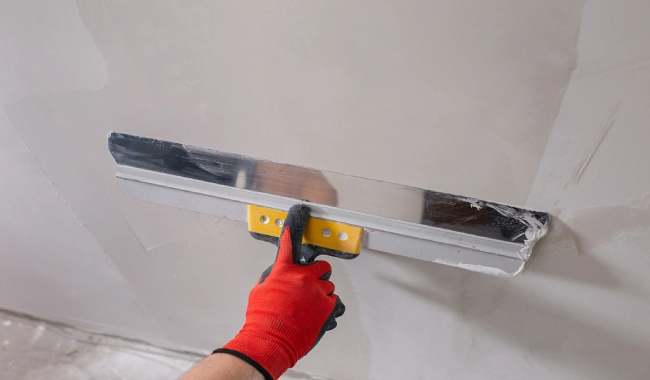
Wall putty is a building material used for surface preparation to fill cracks, repair holes, and smooth out uneven surfaces. It provides a flawless base for painting or wallpaper application. There are two main types of wall putty: interior and exterior, each designed for different environmental conditions.
Interior Wall Putty
Used indoors, it focuses on smoothness, environmental safety, and low formaldehyde emissions, with less emphasis on mechanical strength.
Exterior Wall Putty
Designed for outdoor use, it must have high crack resistance, water resistance, and durability to withstand rain, UV rays, and temperature fluctuations.
As a professional putty additive supplier, WOTAIchem recommends using putty formulated with high-performance polymer resins (such as redispersible polymer powder or VAE emulsion) combined with cement as exterior wall putty.
What Is The Use Of Wall Putty?
▪️Filling wall imperfections – Covers cracks, holes, and uneven surfaces.
▪️Enhancing paint adhesion – Ensures a strong bond between the paint and the wall for a refined finish.
▪️Providing long-term protection – High-quality putty extends the lifespan of wall coatings and prevents damage.
▪️Moisture & mold resistance – Water-resistant putty prevents dampness and mold growth.

How To Use Wall Putty Correctly: Avoid Common Mistakes
1. Choose High-Quality Putty for Walls
Low-quality wall putty can cause peeling, cracks, and detachment, compromising the overall wall finish. Always select a product that meets industry standards.
2. Control the Layer Thickness
Applying putty on wall too thickly reduces adhesion and durability. The ideal thickness per layer is 1-2 mm to ensure proper bonding.
3. Follow the Correct Application Sequence
The correct order is:
Primer → Putty Application → Sanding → Paint or Wallpaper
Skipping the primer weakens the putty’s adhesion and moisture resistance.
4. Avoid Using Putty Unnecessarily
Some thick coatings, such as textured paints, do not require putty. Applying putty in such cases can negatively affect the adhesion and final appearance.
5. Ensure Proper Matching of Two-Component Putty
When using two-component flexible putty, the compatibility between the liquid and powder components is crucial. Some manufacturers use regular exterior wall putty as the powder component with minimal liquid components to reduce costs.
As a result, the mixed putty does not exhibit the actual performance of a two-component flexible putty. Therefore, when using two-component putty, ensure that the liquid and powder components are appropriately matched to maintain their intended properties.
6. Choose a Proper Putty Formula
The formula of the putty directly affects its quality. Some manufacturers use substandard formulations to cut costs, leading to low-quality putty that fails to meet durability and performance standards.
Always choose a putty product with a well-balanced technical and economic performance to ensure good construction quality, ensuring it meets physical, mechanical, and application standards.
7. Avoid Using Powdered Flexible Putty
The market is flooded with “powdered flexible waterproof putty,” but most of these products fail to meet the current technical standards for flexibility.
Flexible putty is not suitable for production in powdered form due to its high raw material cost and difficulty in achieving the expected performance. To ensure proper performance and quality, it is recommended to use paste-type or two-component putty.
Wall Putty Application Procedure: From Preparation To Application
※ How To Prepare Wall Putty: Essential Tools & Materials
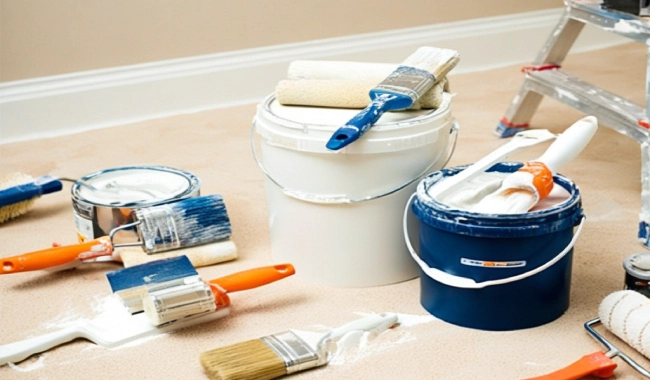
Applying putty is a skillful task—proper preparation makes it easier and more efficient and results in a flawless finish. If you plan to use wall putty at home, here’s what you need:
Tools & Materials
🔎 Wall putty powder or ready-made putty paste
🔎 Additives for putty: Common additives include hydroxypropyl methylcellulose (HPMC), redispersible polymer powder, wood fiber, water repellent agents, and polypropylene fiber. The choice of additives depends on specific requirements. For example, cellulose can be added to increase the viscosity of the putty. To enhance adhesion, an appropriate amount of redispersible latex powder can be incorporated.
🔎 Putty knife (spatula) – Basic tool for mixing and applying putty
🔎 Large & small buckets – For mixing and holding putty
🔎 Mixing stick – Helps in stirring and blending putty evenly
🔎 Trowel or scraper – Used for applying and smoothing putty. Choose high-quality, rust-resistant tools from a local hardware store.
🔎 Plastering trowel
🔎 Brush & broom – For applying putty and cleaning surfaces
🔎 Step stool or ladder – For reaching higher areas
🔎 Sandpaper – Essential for smoothing the surface; start with coarse sandpaper and gradually use finer sandpaper for a polished finish
🔎 Protective gear – Gloves, dust masks, safety goggles, and anti-static clothing for safety
※ Wall Putty Application Procedure Breakdown
1) Surface Preparation – Clean the wall, removing dust, loose paint, or peeling areas. If the wall has cracks or dents, repair them to ensure a smooth surface.
2) Mixing the Putty – Follow the manufacturer’s instructions. Pour putty powder into a mixing bucket, add the required amount of clean water, and stir well with a mixing stick until a uniform consistency is achieved. If additives are needed, gradually add redispersible polymer powder or cellulose ether into the mixture and continue stirring until evenly dispersed.
3) First Layer Application – Use a scraper or putty knife to spread a thin, even layer (1-2mm thick) of putty on the wall. Ensure the putty adheres well to prevent bubbles, cracks, or detachment.
4) Second Layer Application – Once the first layer dries, apply a second coat for better smoothness and coverage. Let it dry completely.
5) Third Layer Application – Apply the final coat to achieve a perfectly even surface. Allow it to dry thoroughly.
6) Sanding the Surface – After the third coat dries, use sandpaper to smooth out imperfections and remove excess putty. Use a strong light source at an angle to inspect the smoothness.
7) Final Touch-ups – Check for uneven areas and fill them with putty if needed. Once dry, sand again for a flawless finish.
8) Final Coating – After putty application, proceed with the topcoat, such as wall paint or wallpaper.
9) Curing & Maintenance – Allow the putty layer to dry completely before painting. Ensure the room is well-ventilated to prevent moisture buildup.
How To Use Wall Putty Video
How To Use Wall Putty: Important Reminders
💠Maintain proper mixing ratio – Avoid making the putty too thick or runny. Mix thoroughly for even consistency.
💠Ensure a clean base surface—Before applying putty, the wall should be free of dust, grease, and loose material.
💠Good lighting is essential – Sufficient lighting helps detect imperfections during application.
💠Control humidity & ventilation – Avoid applying putty on rainy or excessively humid days, as moisture affects adhesion.
💠Allow each layer to dry fully – Applying paint or further coats too soon can lead to poor adhesion.
💠Keep tools clean – Dirty tools can contaminate the putty and ruin the finish.
💠Use protective gear – Wear gloves, masks, and goggles to protect yourself from dust and chemicals.
If you have any questions about how to use wall putty, feel free to leave us a message, and our team will respond you within 24 hours!


Posted by Isabel leave words
Hi, I've been in this industry for five years. I hope you enjoyed my blog. Welcome to leave a comment down below.
Leave a Reply